Folding enthusiast and organizer Tor Rydder from ‘Organizing TV’ explains how to fold and organize your socks. We are going to do a rose-fold so we can store the socks vertically in our dressers.
If you prefer, you can watch the video, or follow along with the steps and illustrations in the article. At the bottom, you will find a downloadable version of the steps to fold socks like this in case you want to save it or print it out for next time.

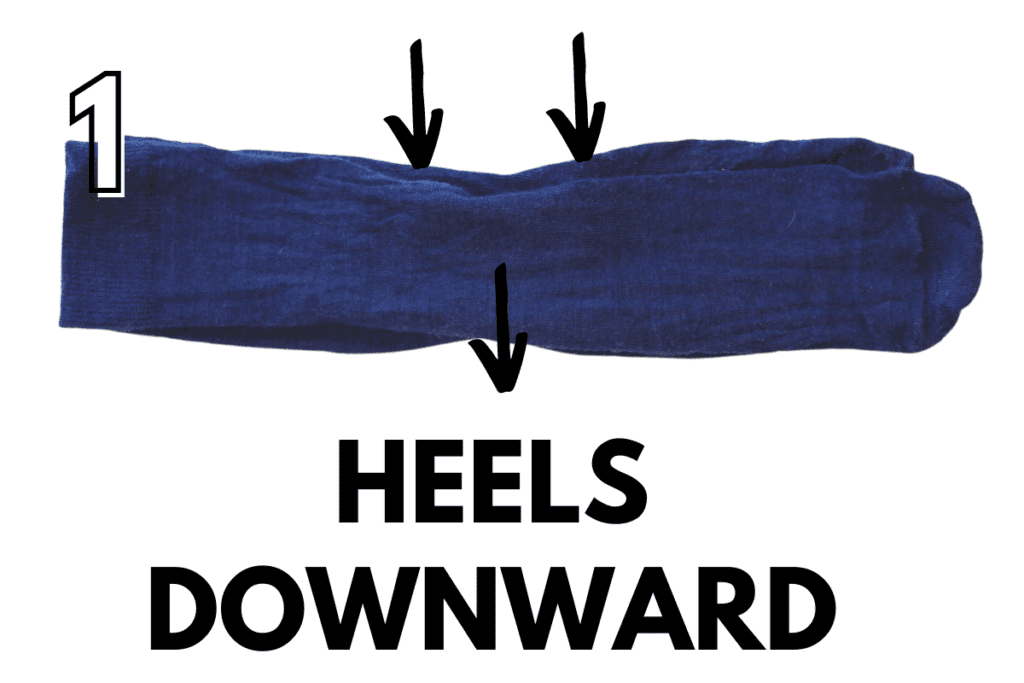
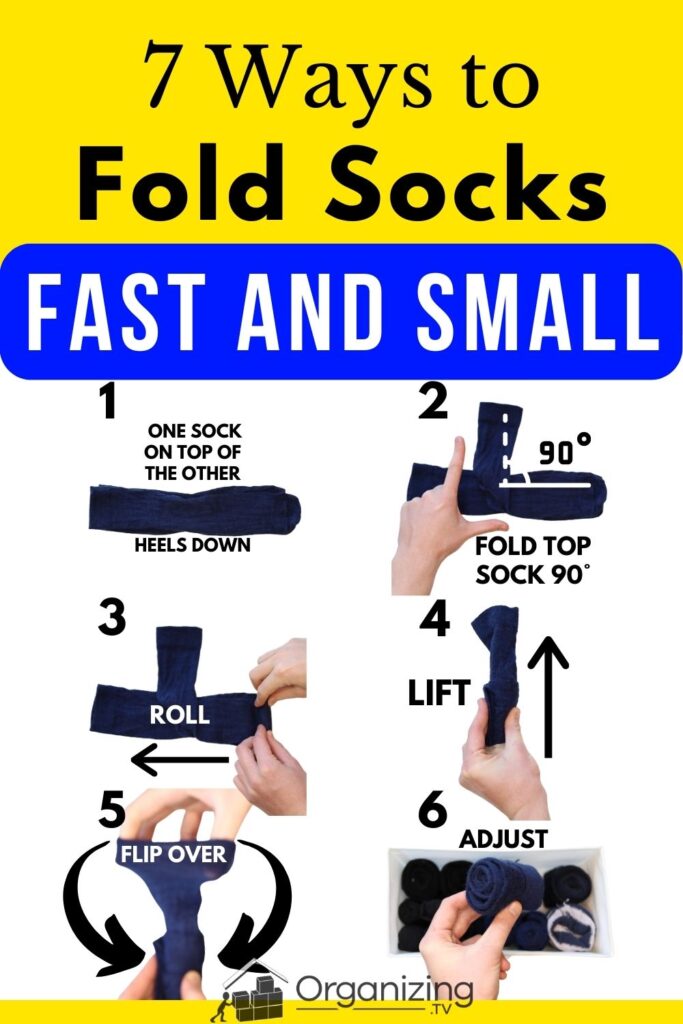
1. Lay socks down with the top facing up
Place the socks with the heels down. You can massage the socks if they naturally lay with the heel out to either side. We keep the heel down in this fold because it increases the durability of the socks as it will stretch and wrinkle less like this.
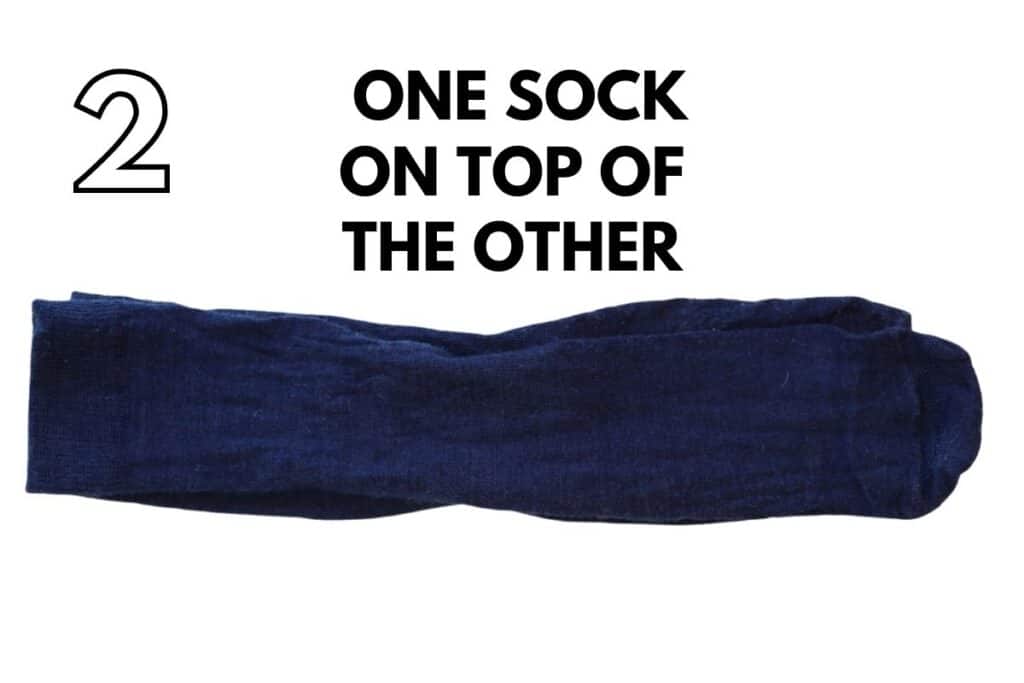
2. Place one sock on top of the other
Place the one sock directly on top of the other one. Both should have the front-facing up, and the heel facing down.
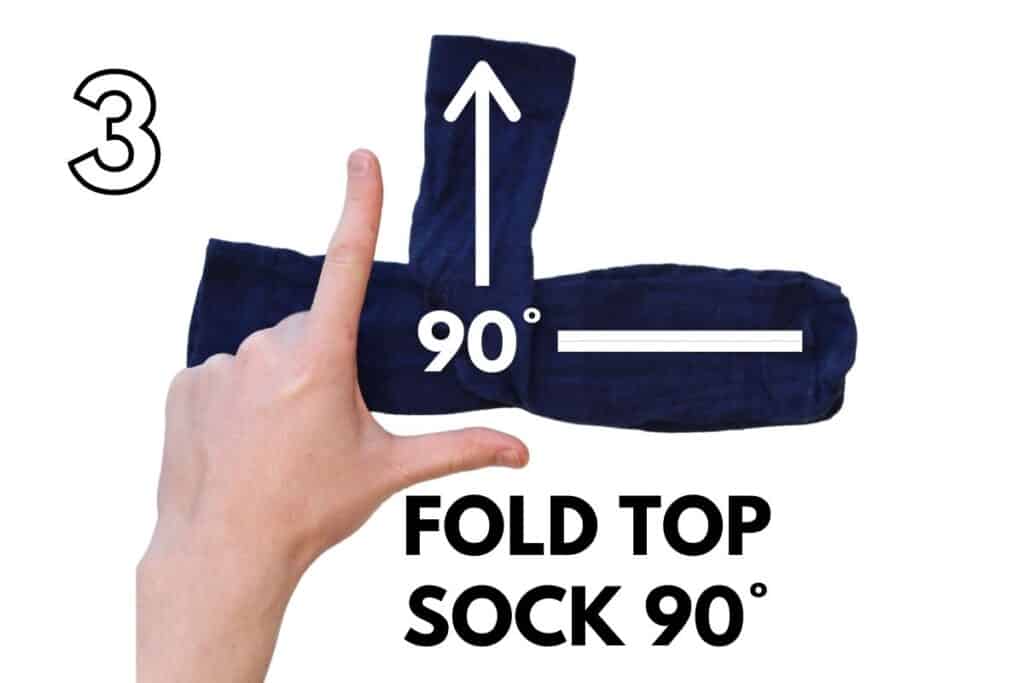
3. Fold the elastic part of the sock on top out 90° from around the middle
Generally, you can fold the top sock out 90° at the point where the heel starts. For longer socks, you can start further up on the ankle of the sock. If you have really thick socks like a rag sock, you may need to start further down on the sock to compensate for the thickness.
Make sure you fold out the part with the elastic, as we will be using it to secure the sock later.
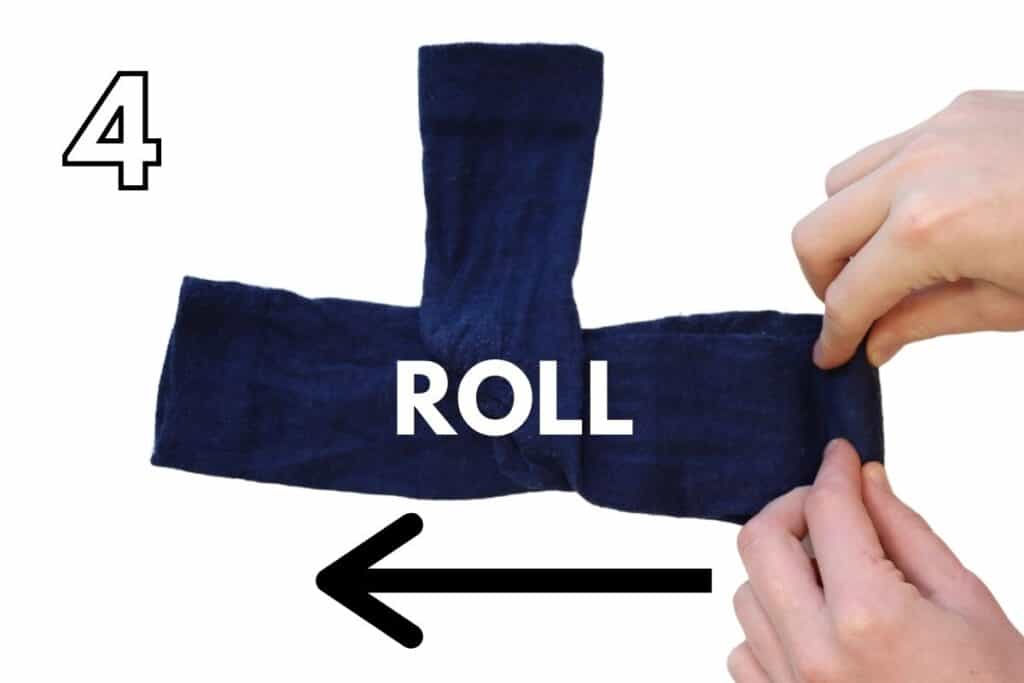
4. From the toes, roll the socks up all the way to the elastic
Roll both socks together from the toes, past the folded out top sock, and all the way to the end of the elastic. It is best to pinch with your fingers to roll effectively, but you roll you want to roll with medium strength, there is no need to roll it too tight. You should feel a slight tug as you roll.
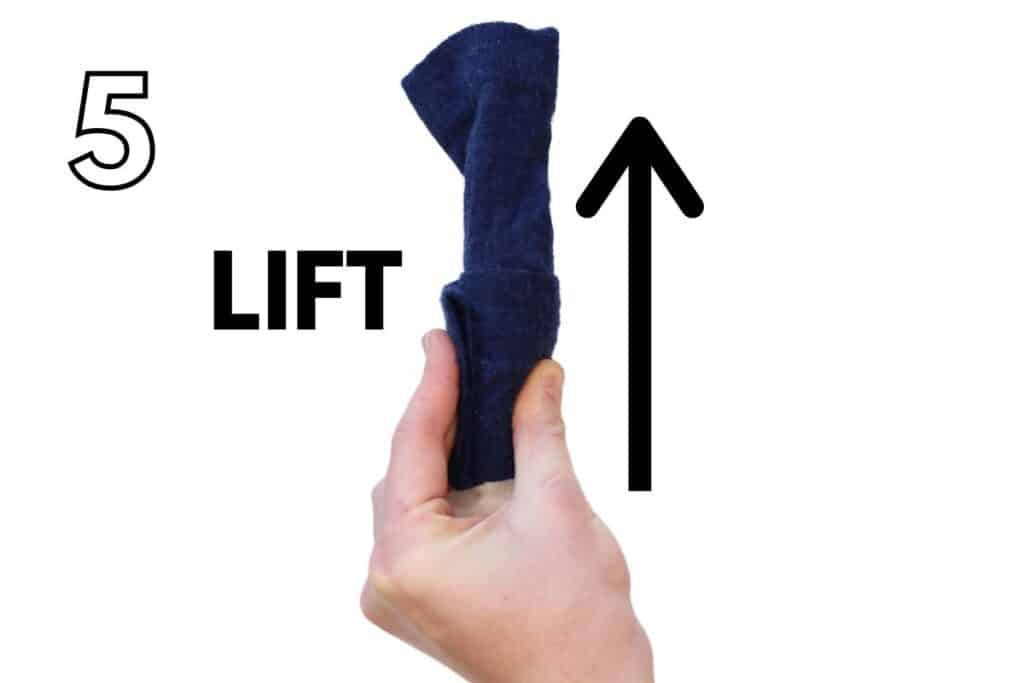
5. Lift the sock roll up with the lose part of the sock facing up
With your right hand, lift the roll up, and make sure that the part with the folded-out sock faces up.
It is best to hold on to the end of the roll with one or two fingers and place your thumb on the opposite side. You want to make sure that the roll doesn’t start to unravel as you lift the sock up.
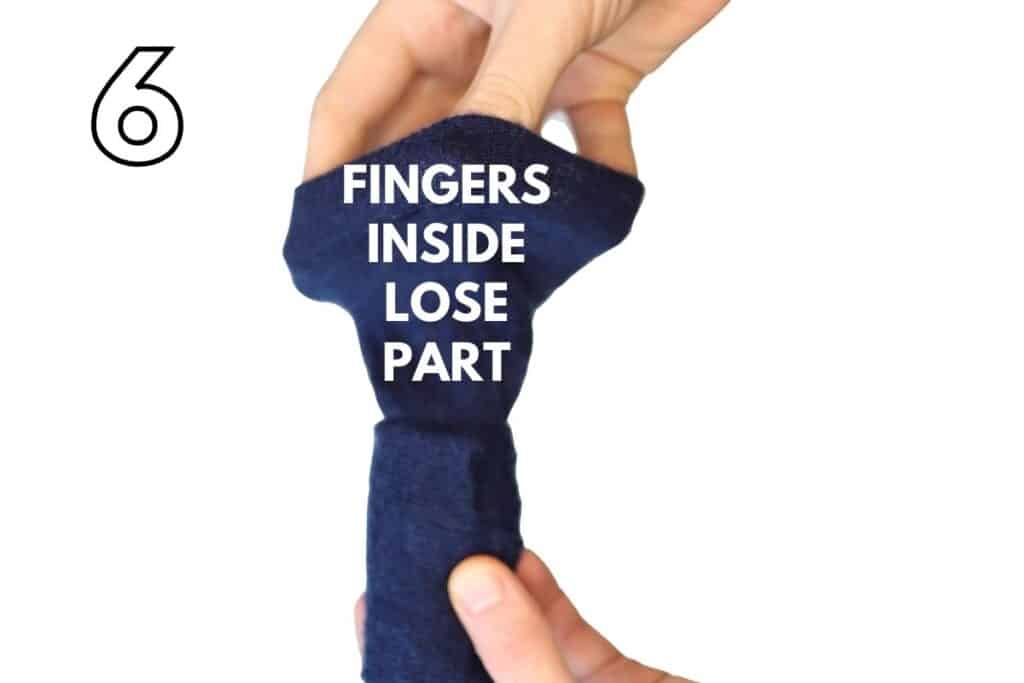
6. Put your left hand fingers inside the elastic of the lose part of the sock
Place all 5 fingers of your left hand into the elastic of the sock that sticks up.
Note: Not the sock that you rolled up and are currently holding with your right hand
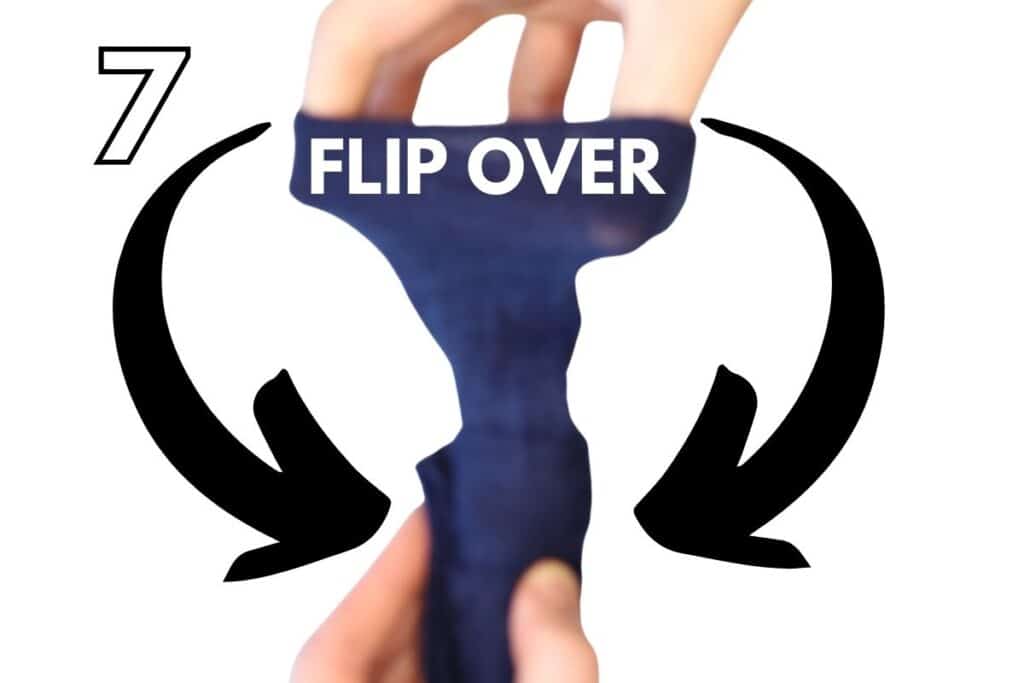
7. Spread the lose part inside-out and pull it down over the roll
Very slightly stretch out the fingers of your left hand, and push your fingers down over the roll. The sock on top should now turn inside-out over the entire roll and secure the roll.
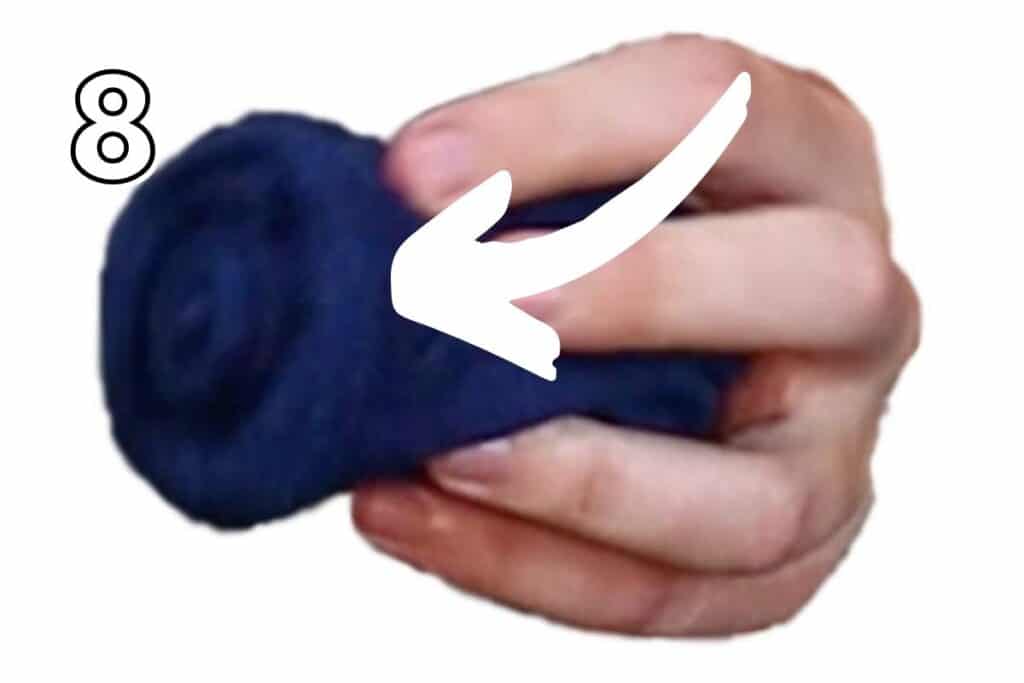
8. Line the inside-out elastic band up so it meets the end of the roll
Adjust the outer sock that you just folded over the roll so that the ends line up. You can massage the sock a little if it doesn’t look exactly like the photos.
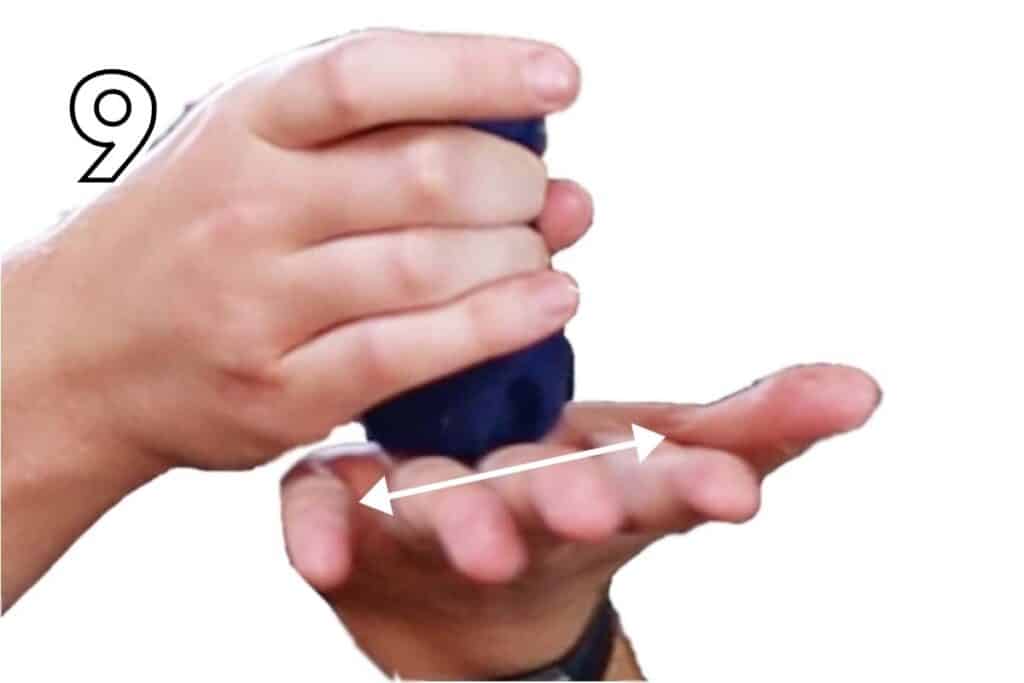
9. Flatten the other end of the sock roll with your palm
To store the socks, you can flatten the bottom of the sock. in your palm rub the bottom of the sock – the side opposite of the elastic band back and forth while holding on to the roll with your other hand. Once it is flat enough to stand on its own you can stop.
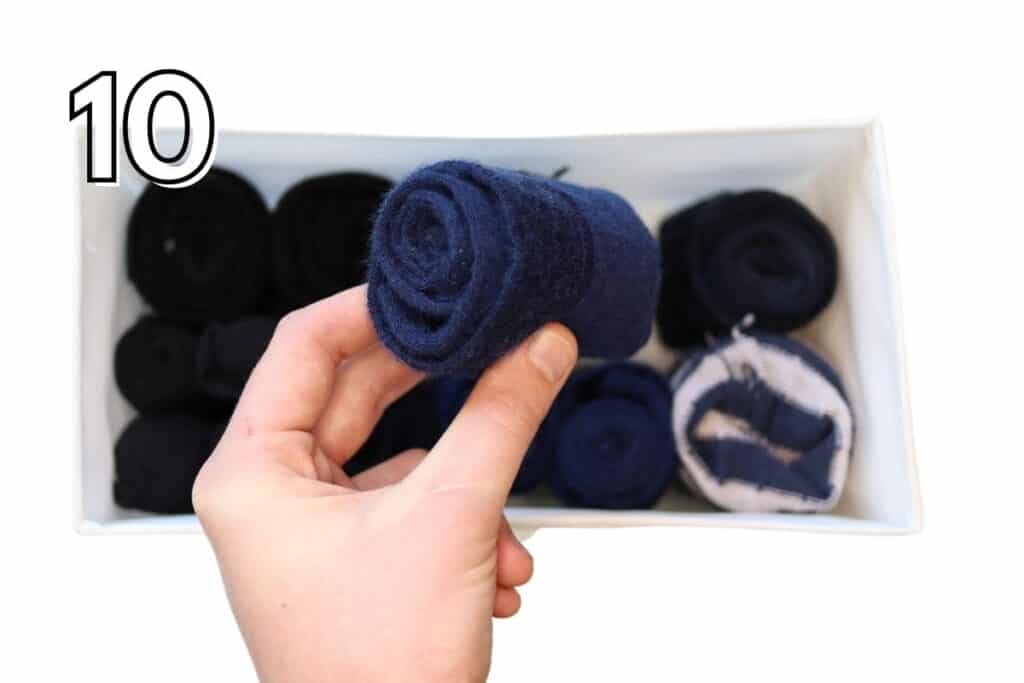
10. Place the sock in an organizing system or directly in your dresser’s sock drawer
You can now stack the socks together with all your other socks in either an organizing system like the one I’m using (Amazon paid link) or you can place them directly into your dresser’s sock drawer.
I prefer to use an organizing system like this as it offers support for the socks, but also because it is easier to separate the different types of socks (and other types of clothes, of course).
Have a look at the folding clothes to save space guide here if you want to learn to organize all your clothes like this.
How to Fold Socks to Save Space

Here are all the main steps of the fold put together in one photo that you can save (or print out) for the next time you need a quick reference.
How to File Fold Socks
File-folding socks is a lot easier than rose-folding them, but the file fold doesn’t hold together nearly as well as the previous one. But if you just want to fold your socks fast and be done with them, then it could be a great option for you.
I also made a guide for file-folding your ankle socks that you can check out here. The ankle socks and regular socks blend together reasonably well when both are file-folded.
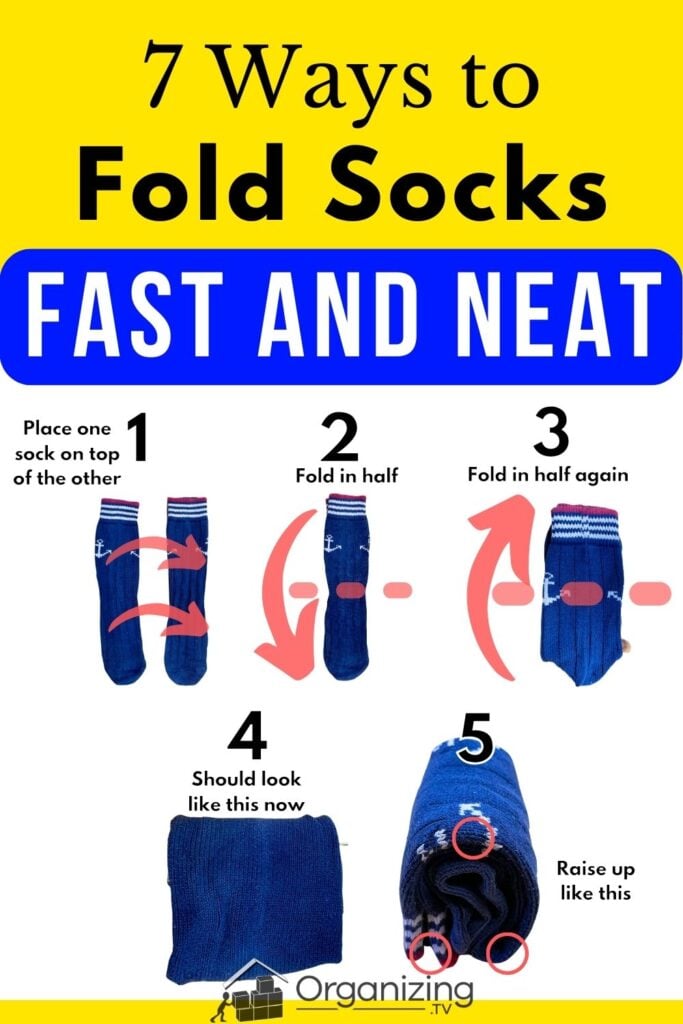
- Place both socks with the heel facing down
- Put one sock directly on top of the other with the heel down.
- From the elastic band, fold the sock down in half to the end of the toes.
- Fold the socks over in half from top to bottom again.
- Place your socks vertically with the side with a single fold facing up.
- Stack multiple sets if file-folded socks next to each other to add some support for the socks.
I recommend that you put an organizing system in your dresser drawers to add some structure to the fold. Personally, I use this one from IKEA (Amazon paid link), and I can recommend it.
But you will be fine using some shoe boxes or plastic boxes in the beginning if you don’t want to spend money on this now.
Here is my guide on how to file-fold the rest of your clothes if you prefer to be done folding your laundry as soon as possible. If you want to save space in your dresser, check out my guide on how to fold clothes to save space.
I’m an expert wardrobe organizer and a bit of a clean freak. I created this website and its YouTube channel to share practical guides about laundry and organizing. My teachings have been featured in multiple large news publications, and I’ve self-published two wardrobe organizing books and an entire course on the subject.