Suppose you’ve noticed that your clothes are still damp after coming out of the Dryer, or your machine is taking forever to dry a small load of laundry. In that case, it may be time to clean your Dryer. As daunting as this may sound, cleaning your machine is quick and easy!
Before cleaning your Dryer, you should know all the machine’s cleaning instructions. There are six steps to take when cleaning your Dryer:
- Unplug your Dryer
- Move your Dryer and remove the clamp
- Check for obstructions
- Remove obstructions
- Reattach your Dryer
- Clean the drum
We’ve assembled a quick and easy step-by-step guide to help you clean your Dryer like a pro. We’ve even included information to help you locate specific, often overlooked components and some handy tips on knowing when to clean your Dryer.
When Should You Clean Your Dryer?
You may notice that over time your Dryer is not working as well as it used to, and your wet clothes are taking longer to dry or aren’t as dry as they should be when they come out of the machine. Or maybe it has just been a while since you last cleaned your Dryer, and you want to give it a long-overdue spring clean.
Either way, cleaning your Dryer is a necessary chore that won’t take more than half an hour to an hour to do, making it an easy task to set time aside for.
Without proper cleaning and maintenance, your Dryer won’t run as efficiently as it should, and the risk of a clogged vent drastically increases. If left unattended, clogged vents could be a significant fire hazard.
Aim to clean your Dryer every six to twelve months, although it largely depends on how often you use your machine. If you use your machine daily and for more than one load of laundry a day, you may want to clean your Dryer every three months.
Before You Get Started
Before you jump right into cleaning your Dryer, you should know that proper dryer cleaning and maintenance require more than just emptying your lint trap. There are a few components that need to be cleaned thoroughly to avoid clogging and poor machine performance.
Before you do get started, ensure that you have the machine’s manufacturer-provided instructions on hand and read them carefully. This is because not every Dryer is the same, and your model may require specific care or cleaning routines.
Once you’ve familiarized yourself with the instructions, you can go ahead and do the same thing with the machine’s dryer vent, lint screen, and lint trap. You can usually find the dryer lint screen and trap on the top of your Dryer or inside of the door. Keeping these components clean can help you to prevent clogging.
The screen should be cleaned after every load of laundry and only takes a few seconds to clean. You need to lift the screen out of its slot and wipe the lint off with your fingers or a dry cloth.
You can clean out the lint trap with a long brush or a vacuum, and you should clean out the dryer vent separately as well. The dryer vent is generally at the back of the machine.
How To Clean Your Dryer
There are a few basic steps involved in cleaning your Dryer. These steps are simple, and you can usually complete them in less than an hour.
1. Unplug Your Dryer
The first step when cleaning your Dryer is to make sure that it is completely turned off and unplugged from the wall socket. You’ll need to unplug it from the socket to move it away from the wall.
If you have a gas dryer, you should turn the gas off before attempting to clean your machine. If you aren’t sure how to turn the gas off, you can consult the manufacturer’s product instructions or contact your local gas company for assistance.
2. Move Your Dryer And Remove The Clamp
Once your Dryer is switched off and unplugged from the wall socket, you should make sure to move it into an area where you’ll have unrestricted access to the front, back, and sides of the machine.
Before you pull it out of its space, you should move it just enough to be able to unscrew the clamp that connects the vent pipe to the wall. You will either be able to do this by hand or with a screwdriver if the tube is held with screws.
After unscrewing the pipe, you can move the Dryer far enough away from the wall to be able to reach the back of the machine without any trouble.
Now, inspect the pipe for any signs of decay or deterioration that indicate that the pipe needs replacing. If it is too worn, you should replace the line before using the Dryer again.
3. Check For Obstructions
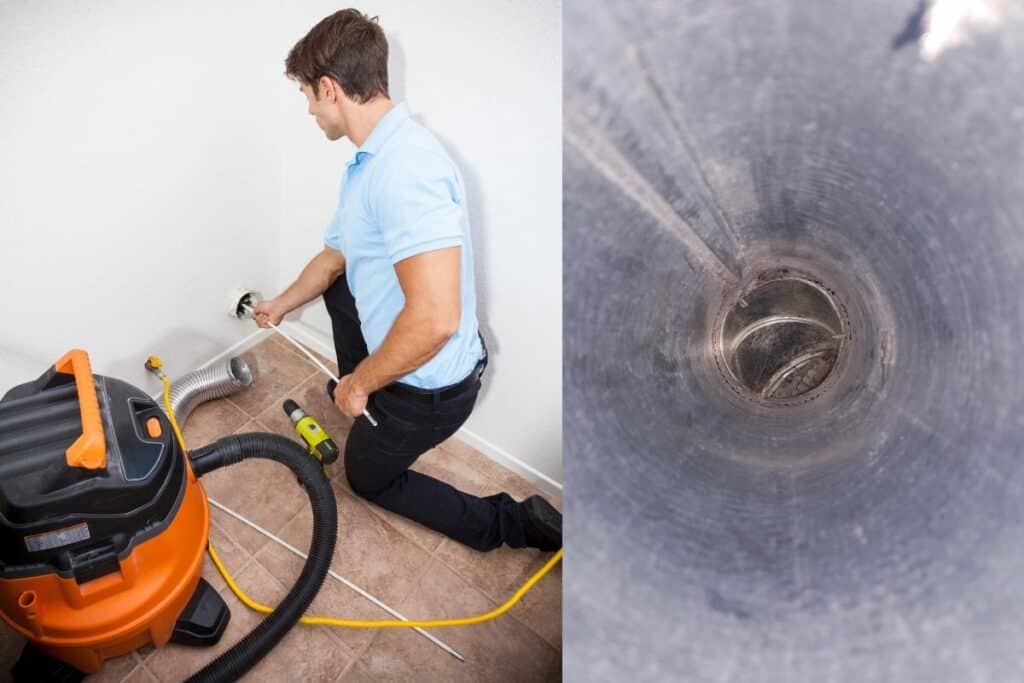
After you’ve inspected the outside of the pipe, it’s time to examine the inside. Using a flashlight or good natural lighting, carefully check the pipe for any clogging, debris, or dirt that may be obstructing it and remove what you can.
The debris may include sharp objects, so it’s best to use thick gloves, a long-handled brush, or some similar tool to help you avoid injury.
4. Remove Any Obstructions
Now you can use a vacuum or a dryer vent cleaning tool to unclog as much lint as possible from the machine. First, remove any debris you can find and check for obstructions to avoid vacuuming up any foreign objects.
You should try and get as far into the vent as possible using your tools. Then, it would help if you made sure that the exterior vent opening had also been unclogged. You can usually find this outside on the wall closest to your Dryer, and you can clear it using the same tools.
More details on cleaning the vent are here.
5. Reattach Dryer
Before you go ahead and call it a day, you need to reattach your dryer vent and make sure that it is fastened tightly.
You can also turn the machine on while it’s empty and run it for a few minutes to shake any other debris loose.
6. Clean The Drum
If debris has come loose when you turn on your Dryer, you can wipe it out using a damp cloth. You can also wipe the rest of the inside barrel or chamber of the Dryer and always leave the door slightly open for a few minutes to air dry.
It would be best if you didn’t use a cloth to dry the barrel as this can leave unwanted fibers inside the machine.
Conclusion
Cleaning your Dryer is an easy and quick task that you should complete every six to twelve months. Keeping up with proper maintenance and machine care will ensure that your Dryer is working optimally for a good, long while.
Next, you can learn how to clean your washing machine, or how to stack your washer and dryer the right way.
I’m an expert wardrobe organizer and a bit of a clean freak. I created this website and its YouTube channel to share practical guides about laundry and organizing. My teachings have been featured in multiple large news publications, and I’ve self-published two wardrobe organizing books and an entire course on the subject.